Sewing a Lunchbox
Or, How to Save a Little Money
With four kids going to school this year we’re trying to save money wherever we can. If I can sew something then we won’t have to buy it. And since we don’t pack lunches that need ice blocks we don’t need the fancy plastic insulated lunchboxes. A nice, washable fabric box will work perfectly.
Last time I went over how to draft a simple pattern, and cut out the pieces for this lunchbox. I have a lot of pictures with this post to help visualize the instructions; if there is something you don’t understand or need help with please comment here or on our Facebook page and I will be happy to help you in any way I can.
This lunchbox needs a front, back, middle, and handle, all cut out of your fabric, interfacing, and lining.
If you are using a fusible interfacing, iron all of it to the front pieces now. I am using felt for the interfacing, so I am sewing it to the front pieces.
This gives the pieces a nice quilted look, which I suppose you could do over the fusible interfacing if you wanted to.
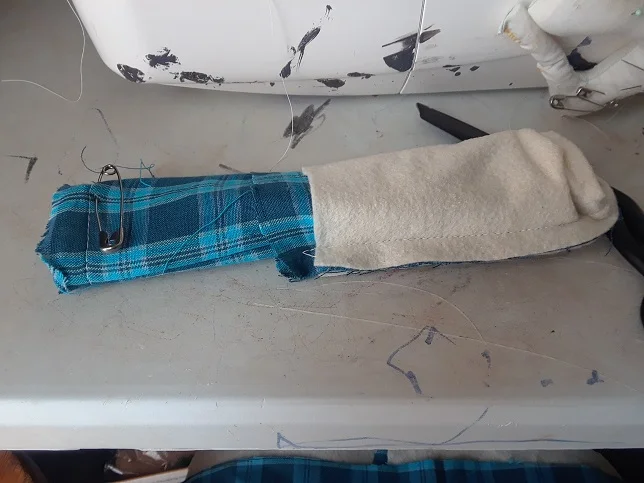
Sew the handle together long-way.
Trim the seam allowance and turn the handle inside out. Set it aside for later.
Pin the middle piece to the sides and bottom of the front piece, with the right sides together. Ease the fabric around the corners
Sew, and trim the seam.
Pin the middle piece to the sides and bottom of the back piece, lining it up with the top of the front piece.
Sew and trim the seam. You should now have a general box shape with a flap at the top.
Stop, and admire your work, and tickle your sewing buddy. Refill your coffee if you’re out by now.
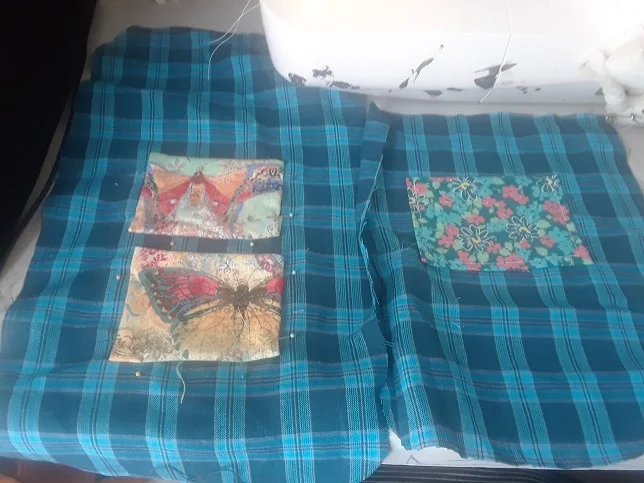
If you want pockets, now is the time to add them. I sewed rectangles to the right sides of the inside pieces.
Pin and sew the front, middle, and back pieces the same way that you did with the front pieces.
Pin the handle upside down to the right side of the outside pieces of the lunchbox.
Turn the inside piece inside out, and stuff it down inside the front piece of the box. The right sides of both pieces should be facing each other.
Pin around the top edge and the flap, lining up your fabrics. Ease the fabric together around the corners and over the handle.
Sew it together, leaving a gap at the top of the flap. Go carefully and slowly around the corners and over the handle, some sewing machines can’t take that much fabric very well.
Turn the whole thing inside out through the gap you left at the top of the flap. It will take some pulling and pushing, and it will look really odd for a few minutes.
Stuff the inside piece down the outside piece. You should now have a rough looking lunchbox.
Pin around the opening and topstitch the seam down, closing the gap you had turned it through.
Pin and top stitch the outside seams of the lunchbox.
Stop again and tickle your other sewing buddy.
You should now have a nice looking square lunchbox.
Add some velcro to the front and the flap so that it will stay closed. I do not buy the sticky velcro—it never sticks and I can’t sew over it. I recommend the sew-on velcro.
This is the inside of one of the boys lunchboxes. I sewed the interfacing to the inside pieces instead of the outside to see what effect it would have on the overall product. It didn’t work as well as I’d hoped. But at this point it just looked so good.
I used a tube of craft fabric paint to write the kids names on the inside, and I put special bookmarks in the pockets. When school starts I will put notes of love and encouragement in there too.
A good, large, durable lunchbox is a minimum of $10, I just saved at least $40. And the kids get the bonus of having a lunchbox that no one else in the whole world has. I’m happy, they’re happy, and everyone wins.


